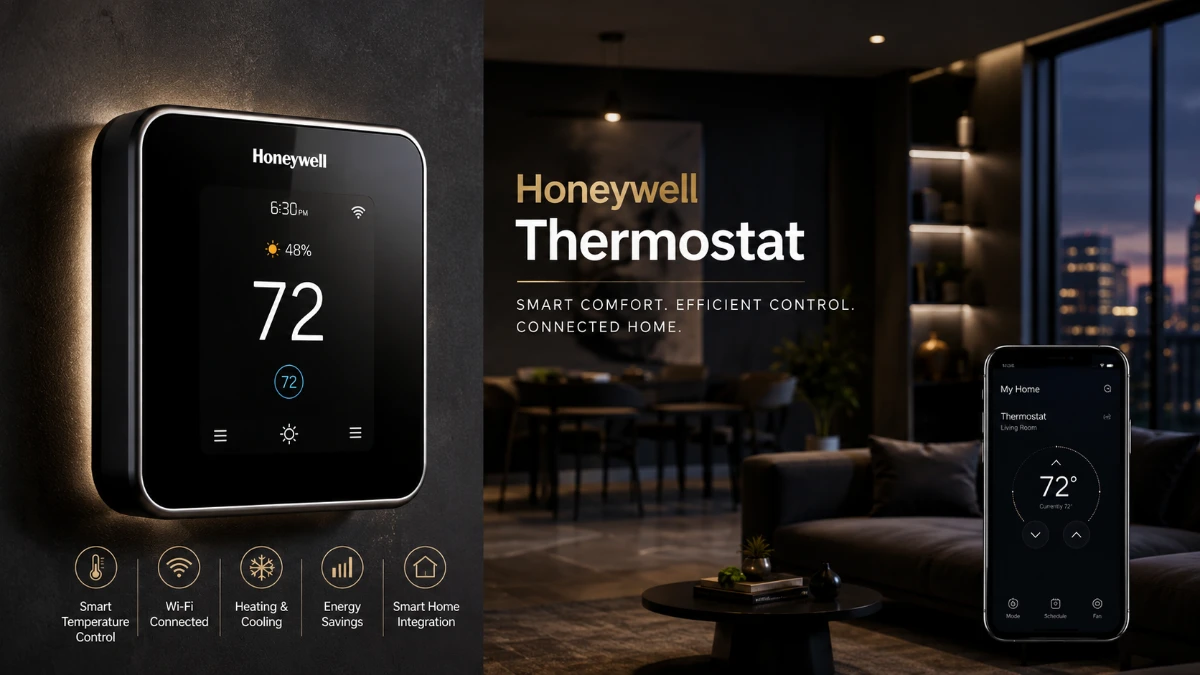

A Honeywell Thermostat controls the heating and cooling system in your home by monitoring indoor temperature and telling the HVAC equipment when to heat, cool, or circulate air. Depending on the model, it may also provide Wi-Fi control, programmable schedules, room sensors, occupancy features, humidity control, and smart-home integration.
The important thing to know is that Honeywell Home thermostats are not all the same. Different models have different power requirements, HVAC compatibility, Wi-Fi capabilities, sensors, apps, and installation procedures.
So whether you are choosing a new model, replacing an existing one, setting up Wi-Fi, or trying to fix a problem, start with the exact model number.
Start here: Identify the model first. Then check HVAC compatibility → power/C-wire → system settings → Wi-Fi → app/account → schedules → sensors → wiring → HVAC equipment. This order helps determine whether the thermostat, network, wiring, or heating and cooling system is actually responsible.
What Is a Honeywell Thermostat?
A Honeywell Home thermostat is a control device for a home’s heating and cooling system.
Depending on the model, it can manage:
- Furnace heating
- Central air conditioning
- Heat pumps
- Multi-stage heating and cooling
- Fan operation
- Auxiliary or emergency heat
- Humidification and dehumidification equipment
- Ventilation
- Programmable temperature schedules
- Wi-Fi and mobile-app control
- Room sensors
- Occupancy-based features
- Smart-home integrations
Basic programmable models focus on temperature control and scheduling. Connected models add remote control and other smart features, while advanced models can support more complex HVAC systems and room-level comfort management.
For residential products, Resideo uses the Honeywell Home brand under license following the 2018 spin-off of Honeywell’s Homes business.
The result is a broad product family rather than one universal thermostat design.
Honeywell Thermostat Models
The exact model matters because two thermostats can look similar while having very different capabilities.
Resideo’s current support resources include connected and programmable T-Series models, T9 and T10 models, and newer X-Series products. Its UWP compatibility page also lists a wide range of thermostats that use the UWP wall plate.
Which Type Is Right for You?
| Type | Better suited for | Important considerations |
| Basic programmable | Users who want scheduled temperature control | Fewer connected features |
| Smart Wi-Fi | Users who want remote app control | Network and power requirements matter |
| T9-style smart model | Homes that need room-level comfort control | Compatible room sensors and system compatibility matter |
| T10/T10+ Pro | More advanced HVAC systems and comfort control | More configuration options; some installations are better handled professionally |
| X-Series | Users looking for newer connected or programmable options | Features vary substantially by model |
This is a decision guide, not a substitute for the exact product specification.
For example, Resideo’s T6 Pro documentation shows support for different conventional and heat-pump configurations depending on the specific model, while T10 Pro models support more advanced equipment configurations and sensor options.
T9: Best When Room-Level Comfort Matters
The T9 is designed around smart temperature control and compatible wireless room sensors. Its installation documentation supports conventional systems, heat pumps, radiant heat, and sensor-based configurations depending on the setup.
It makes the most sense when:
- One room is consistently warmer or cooler
- You want sensor-based comfort control
- You want connected control
- Your HVAC system is compatible with the model
T10 and T10+ Pro: Better for More Complex Systems
The T10 Pro family is aimed at more advanced installations.
Current Resideo documentation lists features such as:
- Wi-Fi connectivity
- RedLINK sensor support
- Geofencing
- Flexible programming
- Heat-pump support
- Dual-fuel compatibility
- Indoor-air-quality control on applicable T10+ configurations
- Multiple heating and cooling stages
Some T10+ configurations can support additional equipment through an Equipment Interface Module.
This makes the family particularly relevant when the HVAC system is more sophisticated than a simple single-stage furnace and air conditioner.
X-Series: Check the Individual Model
The newer X-Series demonstrates why model-specific research matters.
Resideo’s current comparison information shows differences among X2S, X7S, and X8S in areas such as Wi-Fi connectivity, scheduling, power configuration, HVAC stages, and energy certification.
For example, the X-Series comparison identifies the X8S as a hardwired model with C-wire power and 2.4/5 GHz Wi-Fi, while the X7S and X2S have different configurations.
So avoid statements such as “all Honeywell Home X-Series thermostats work the same way.”
They do not.
Honeywell Thermostat Compatibility
Before buying or installing a thermostat, check the HVAC system first.
Identify whether your home has:
- Conventional furnace and AC
- Heat pump
- Dual-fuel system
- Boiler
- Radiant heat
- Fan-coil system
- Multi-stage equipment
- Zoning
- Humidifier
- Dehumidifier
- Ventilation equipment
- Other indoor-air-quality accessories
- Communicating HVAC equipment
Also determine:
- Heating stages
- Cooling stages
- Heat-pump stages
- Auxiliary heat
- Emergency heat
- Existing thermostat wires
- C-wire availability
- Existing wall plate
- Required equipment interface or accessories
Resideo provides an official thermostat wiring-compatibility tool because compatibility depends on the specific thermostat and home’s wiring.
UWP Wall Plate Compatibility
Many T-Series products use the UWP wall plate, but that does not mean every thermostat is automatically compatible with every HVAC system.
Resideo’s current UWP compatibility list includes models such as T5 Smart, T9, T6 Pro, T10 Pro, T1 Pro, T3 Pro, and T4 Pro.
The practical lesson is simple:
Wall-plate compatibility and HVAC compatibility are not the same thing.
A thermostat can physically fit the wall plate while still requiring different wiring, configuration, or equipment support.
Does a Honeywell Thermostat Need a C-Wire?
It depends on the exact model.
Many connected models require continuous power and therefore use a C-wire or an approved power adapter. Other products can have different power arrangements.
For example, T9 installation documentation specifies a C-wire or compatible C-wire power adapter. Current X-Series specifications also show model-specific power configurations rather than one universal requirement.
Why the C-Wire Matters
A C-wire provides a continuous return path for compatible powered thermostats.
A missing or incorrectly connected C-wire can contribute to:
- Blank displays
- Repeated restarts
- Connectivity problems
- Intermittent operation
- Installation failures
But do not assume that adding a C-wire automatically makes an incompatible system compatible.
Always verify the exact installation requirements.
How to Set Up a Honeywell Thermostat
The exact installation process varies by model, but the overall workflow is straightforward.
1. Identify the Existing System
Determine the heating and cooling equipment before removing the old thermostat.
2. Record Existing Terminal Connections
Take a clear photo and identify wires by their terminal designations, not just their colors.
3. Confirm Compatibility
Use the manufacturer’s compatibility information before installation.
4. Turn Off HVAC Power
Follow the installation manual’s power-disconnection instructions before handling wiring.
5. Install the Wall Plate
Secure the correct wall plate and ensure it is level if the model requires leveling.
6. Connect the Wires
Place each wire into the terminal specified by the installation guide.
7. Restore Power
Turn the HVAC power back on and allow the thermostat to initialize.
8. Configure the HVAC System
Depending on the model, this can include:
- System type
- Heating stages
- Cooling stages
- Heat pump
- Reversing valve
- Auxiliary heat
- Fan settings
- Accessories
9. Connect the Network
For Wi-Fi models, connect to the supported network and complete account registration.
10. Test the System
Test heating, cooling, and fan operation before considering the installation complete.
Installation Example
Suppose an existing system has R, C, Y, G, and W terminals and the replacement model supports that configuration.
The correct process is not:
“R is red, Y is yellow, so I’ll connect by color.”
Instead:
“The existing wire is connected to Y, so I will document Y and follow the new thermostat’s installation instructions for that terminal.”
That distinction becomes especially important when working with heat pumps, multiple stages, or accessory equipment.
Honeywell Thermostat Wi-Fi Setup
Smart models can connect to a home network and provide remote control through a compatible app.
When Wi-Fi setup fails, separate the problem into four layers:
Thermostat → Router → Internet → App/account
Check:
- Wi-Fi is enabled
- Network name is correct
- Password is correct
- The model supports the network configuration
- Signal strength is adequate
- Router has internet access
- The thermostat is within useful wireless range
- Software is current
- The correct app/account is being used
2.4 GHz vs. 5 GHz
Do not apply one Wi-Fi rule to every model.
Resideo’s current product information shows that supported bands vary by product. For example, the X8S supports 2.4 and 5 GHz Wi-Fi, and T10 Pro documentation also identifies 2.4 and 5 GHz support.
Therefore, the correct approach is:
Check the exact model’s Wi-Fi specification first.
Wi-Fi Example: Connected but Offline in the App
Imagine the thermostat shows that it is connected to your home network, but the mobile app says the device is offline.
That points away from a simple thermostat-to-router connection failure.
Check:
- Can another device access the internet?
- Is the router online?
- Is the thermostat registered to the correct account?
- Is the correct home/location selected?
- Is the app current?
- Is there a service or cloud communication issue?
Resideo’s support center provides separate resources for Wi-Fi, app connection, installation, programming, replacement, and troubleshooting, reinforcing the need to isolate the failure rather than treating every offline message as the same problem.
App and Account Problems
A connected thermostat can work locally while the app has a separate problem.
Possible causes include:
- Wrong account
- Wrong home/location
- App issue
- Network issue
- Internet outage
- Cloud communication problem
- Software issue
- Account registration problem
If the thermostat itself works normally but remote control does not, investigate the app and account before resetting the thermostat.
Also check the current app guidance for your exact model because connected-product ecosystems can change over time.
Temperature, Schedule and Hold Problems
A setpoint that changes unexpectedly is not automatically evidence of a hardware failure.
Check:
- Programmed schedule
- Temporary hold
- Permanent hold
- Vacation settings
- Home/Away automation
- Geofencing
- Room sensors
- Other household users
- Smart-home automation
Temperature-Change Example
Suppose cooling is set to 72°F at noon and changes to 76°F at 2 p.m.
Possible explanation:
- The afternoon schedule started.
- A temporary hold ended.
- An automation changed the target.
- Another user changed the setting.
- Occupancy logic changed the target temperature.
The useful diagnostic question is:
“What rule changed the setpoint?”
rather than:
“Why is the thermostat broken?”
This distinction can prevent an unnecessary replacement.
Room Sensor
A compatible room sensor can improve comfort when the thermostat is located somewhere that does not represent the room you care about.
Consider:
- Hallway: 72°F
- West-facing bedroom: 78°F
The thermostat may be correctly measuring the hallway while the bedroom remains uncomfortable.
A compatible sensor can provide temperature information from the Bedroom and, on supported systems, allow that room to receive greater priority.
T9 and T10 documentation includes compatible wireless sensor options and sensor-based comfort features.
Where Should a Room Sensor Go?
Avoid placing a sensor near:
- Direct sunlight
- Supply vents
- Drafts
- Windows
- Lamps
- TVs
- Exterior walls with unusual temperature exposure
- Areas with poor air circulation
The goal is to measure the temperature of a representative occupied space.
Heating and Cooling Problems
A thermostat can have a working display and Wi-Fi connection while the HVAC equipment still fails to respond.
Start by checking:
- System mode
- Temperature setting
- Power
- Error messages
- “Wait” status
- HVAC configuration
If the device is clearly calling for heating or cooling but the equipment does not respond, the problem may be outside the thermostat.
Possible causes include:
- Furnace failure
- Compressor failure
- Capacitor failure
- Control-board problem
- Ignition problem
- Refrigerant problem
- Frozen coil
- Condensate safety issue
- Airflow restriction
HVAC Diagnosis Example
Suppose:
- The thermostat calls for cooling.
- The indoor blower starts.
- The thermostat continues showing a cooling call.
- The outdoor compressor never starts.
That pattern points toward the HVAC equipment or control circuit, not automatically the thermostat display or Wi-Fi connection.
The thermostat may be doing exactly what it is supposed to do.
Heat Pump Problems
Heat pumps require extra care because the reversing valve and heating/cooling configuration can produce symptoms that look like thermostat failure.
Potential causes include:
- Incorrect system type
- Incorrect O/B configuration
- Incorrect heating stages
- Incorrect cooling stages
- Auxiliary heat configuration
- Emergency heat configuration
- Wiring problems
- Equipment compatibility
T9 documentation, for example, includes system-type and reversing-valve configuration settings for heat-pump installations.
Important Safety Rule
Do not move heat-pump wires randomly to see whether the system behaves differently.
Instead:
- Identify the exact thermostat.
- Identify the HVAC system.
- Document existing terminals.
- Check the installation guide.
- Verify the O/B configuration.
- Get professional help if the system configuration is unclear.
Wiring Guide
Common terminal designations can have functions such as:
| Terminal | Common function |
| R | 24V power |
| Rc | Cooling-side 24V power on applicable systems |
| Rh | Heating-side 24V power on applicable systems |
| C | Common |
| Y / Y2 | Cooling or compressor stages |
| G | Fan |
| W / W2 | Heating stages |
| O/B | Heat-pump reversing valve |
| AUX/E | Auxiliary or emergency heat |
| U | Certain IAQ or accessory equipment |
These are general functions, not universal wiring instructions.
The exact terminal arrangement depends on the thermostat and HVAC system.
Resideo’s installation documentation repeatedly emphasizes model-specific wiring, and its UWP documentation notes that wiring examples can vary by installation.
When to Stop DIY Wiring
Stop and verify compatibility if you encounter:
- Unusual terminals
- Thick line-voltage conductors
- Communicating-system wiring
- Complex zoning
- Multiple accessory controls
- Humidifier/dehumidifier equipment
- Unclear existing connections
- Heat-pump wiring you cannot confidently identify
A wiring mistake can damage equipment or create an unsafe condition.
Troubleshooting by Symptom
| Symptom | First check | Likely layer |
| Blank display | HVAC power and C-wire | Power |
| Won’t connect to Wi-Fi | Network, password and model specification | Network |
| App says offline | Internet, account and app | Connectivity |
| Temperature changes automatically | Schedule, hold and automation | Settings |
| One room stays hot | Sensor placement and airflow | Comfort/HVAC |
| No heating | Mode, setpoint and HVAC power | HVAC |
| No cooling | Mode, setpoint and compressor delay | HVAC |
| Heat pump behaves incorrectly | O/B and system configuration | Configuration |
| Problem began after replacement | Terminal connections and compatibility | Wiring |
| Sensor will not connect | Compatibility, pairing and power | Sensor |
| Repeated power loss | C-wire and HVAC control circuit | Electrical/HVAC |
| “Wait” appears | Compressor-protection delay | Normal protection on supported models |
This table is intended as a starting point, not a universal diagnosis.
Restart vs. Factory Reset
A restart and a factory reset are not the same thing.
| Action | Best used for |
| Thermostat restart | Temporary software or connection issues |
| Router restart | Network communication problems |
| Wi-Fi reset | Persistent network configuration problems |
| Factory reset | Persistent configuration problems when appropriate |
Start with the least disruptive option.
Before resetting, check:
- Power
- C-wire
- System settings
- Wi-Fi
- Internet
- App/account
- Schedule
- Sensors
- Wiring
- HVAC operation
A factory reset cannot repair a failed compressor, transformer, control board, poor airflow, or incompatible HVAC wiring.
Honeywell Thermostat Maintenance Tips
A few simple habits can reduce avoidable problems.
Keep the Thermostat Area Representative
Avoid blocking the thermostat with:
- Curtains
- Furniture
- Heat-producing electronics
- Direct sunlight
- Decorative objects
The temperature sensor needs representative room conditions.
Maintain the HVAC System
A thermostat cannot compensate for a severely restricted HVAC system.
Follow the equipment manufacturer’s recommendations for:
- Filter maintenance
- Seasonal inspections
- Coil maintenance
- Condensate drainage
- Professional HVAC servicing
Keep Connected Equipment Current
For smart models, follow the manufacturer’s guidance for software and app updates.
If a connected device becomes unreliable, a restart or documented software update may resolve a temporary issue before more disruptive troubleshooting is attempted.
When to Replace the Thermostat
Replacement makes sense when there is a specific reason.
Consider replacing it when:
- Hardware failure is confirmed
- The existing model is incompatible with your HVAC system
- Important features are missing
- Connectivity limitations cannot be resolved
- You need room-level comfort control
- You need more advanced HVAC support
- You want a different smart-home ecosystem
Don’t replace a working device simply because a newer model exists.
What Should You Compare Before Buying?
| Feature | Why it matters |
| HVAC compatibility | Determines whether the model can control your equipment |
| C-wire requirement | Affects installation complexity |
| Wi-Fi | Enables remote control |
| 2.4/5 GHz support | Matters for network compatibility |
| Room sensors | Useful for multi-room comfort |
| HVAC stages | Important for advanced systems |
| Heat-pump support | Critical for heat-pump homes |
| IAQ support | Useful with compatible accessories |
| Scheduling | Controls recurring temperature changes |
| Occupancy features | Can automate temperature behavior |
| App ecosystem | Determines mobile control |
| Smart-home integration | Important for connected homes |
| Wall-plate compatibility | Can affect replacement work |
This comparison is more useful than simply asking which model is “best.”
The right question is:
Which features solve the problem in your home?
For example, a homeowner with a simple conventional system may not need the same capabilities as someone with multiple HVAC stages, room sensors, or indoor-air-quality equipment.
Read more: Honeywell Thermostat: Complete Guide to Models, Setup, Wi-Fi, Wiring and Troubleshooting
When to Call an HVAC Professional
Some problems should not be solved through trial and error.
Get professional help for:
- Persistent power loss
- Repeated breaker trips
- Electrical smells
- Unclear wiring
- Complex heat-pump configuration
- Auxiliary or emergency heat problems
- Multi-stage HVAC problems
- Zoning controls
- Boiler controls
- Communicating HVAC systems
- Humidifier/dehumidifier integration
- Suspected transformer failure
- Control-board problems
- Refrigerant problems
- Frozen coils
- Compressor problems
- Furnace ignition problems
The key distinction is simple:
If the thermostat is correctly calling for heating or cooling but the equipment does not respond, the HVAC system may be the problem.
Frequently Asked Questions
What is a Honeywell thermostat?
A Honeywell Home thermostat is a device that controls heating and cooling equipment. Depending on the model, it may also provide scheduling, Wi-Fi control, room sensors, occupancy features, humidity control, and smart-home integration.
How do I know which model I have?
Look for the model number on the device, wall plate, packaging, manual, app, or account information. The model number matters because power, Wi-Fi, sensors, HVAC compatibility, and reset procedures vary.
Does it need a C-wire?
Some models require a C-wire or approved adapter, while others have different power arrangements. Check the exact model’s installation and compatibility documentation before changing wiring.
Why is my thermostat blank?
Check HVAC power, the circuit breaker, the heating or cooling power switch, the furnace or air-handler door, and C-wire requirements. If power repeatedly disappears, the underlying HVAC control circuit may need professional diagnosis.
Why won’t it connect to Wi-Fi?
Check the network password, signal strength, router internet access, supported Wi-Fi band, and exact model requirements. Do not assume every model has identical network specifications.
Why does the app say offline?
The device may be connected to the local network while internet, account, app, or cloud communication is unavailable. Check those layers separately.
Why does the temperature keep changing?
Check schedules, holds, vacation settings, geofencing, Home/Away automation, sensors, and other users before assuming the device has failed.
Can it work without Wi-Fi?
That depends on the model. Wi-Fi is generally associated with connected features such as remote app control, while local thermostat operation varies by product.
Can it work with a heat pump?
Many Honeywell Home models support heat pumps, but the supported stages and configuration vary. Verify the exact model and system before installation.
What does “Wait” mean?
On supported models, “Wait” can indicate a compressor-protection delay. For example, T9 documentation instructs users to wait five minutes when heating or cooling does not immediately respond.
Can a room sensor fix a hot bedroom?
It can improve temperature measurement and allow compatible systems to prioritize that room, but it cannot repair inadequate airflow, duct leakage, insulation problems, or insufficient HVAC capacity.
Should I factory-reset it?
Usually not as the first step. Check power, settings, Wi-Fi, account, sensors, wiring, and HVAC operation first. If a reset is necessary, use the procedure for the exact model.
How often should I replace it?
There is no universal replacement interval. Replacement is more appropriate when there is confirmed hardware failure, incompatibility, persistent limitations, or a genuine need for features the existing model cannot provide.